Guide entry section:
Image:
Guide Entry Text:
Let's Talk Process
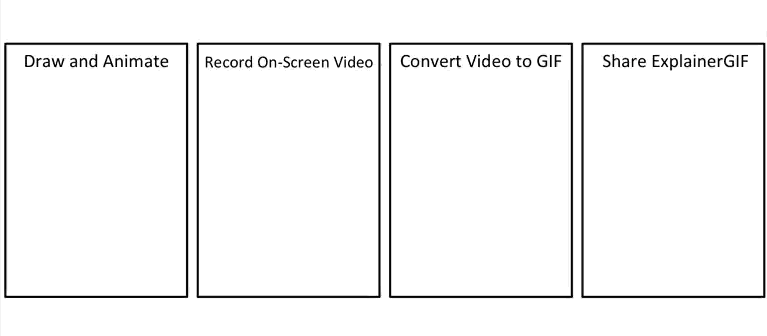
The rest of this guide will show you exactly how to create ExplainerGIFs. There are four key parts to this process:
- Add and animate visuals using presentation software (covered below)
- Record those animations using screencasting
- Edit the video made from screencasting and convert it to a GIF
- Share the GIF
The ExplainerGIF below outlines these steps visually:
poster image:
Video:
Guide Entry Text:
PowerPoint and Keynote have flexible tools for animating shapes and images.
As you saw in the previous section, PowerPoint can serve as a great animating tool. Once you get the controls down, the options are endless.
For our first example, we'll start very simply and animate a Venn Diagram. By using on a very short and sweet example, we can focus on the skills and mechanics of animation rather than colors and words.
A few things to note:
- The skills portion of this guide will rely heavily on video screencasts. The videos are a rich source of information and I encourage you to watch them.
- The version of PowerPoint that appears below is PowerPoint 2011 for Mac. It should match the most modern versions of PowerPoint for PC.
- While your animation features may differ across software and versions, including Keynote, the ideas remain very similar.
Here's the video:
Guide Entry Text:
As you can see from the example above, animations can be easy to produce in PowerPoint. With some experience, you'll see that images can appear, disappear and move in almost any way you can imagine.
Practice Time
Open a blank slide in PowerPoint with a white background. Draw a few shapes on the slide. Any shapes will do for now - this is just practice.
Open the "Animation" options and experiment. Try these kinds of animations:
Entrance Effects:
- Have the shape "appear"
- Have the shape "fly in"
Exit Effects:
- Have the shape "disappear"
- Have the shape "fly-out"
Note that you can control the speed, direction and order of the animations by using the "Animation Options". Click the "Reorder" button to see a list of every animation on the slide.
Motion Effects:
- Have the shape move from one spot to another in straight line, using the motion "path" options.
- Have the shape move on a curve.
Combine Animation Actions:
- Have a shape appear, move across the slide, then disappear.
- Have a shape move to multiple points on the slide.
Custom Animations: Use the "Custom Animations" tool to experiment with the speed and order.
- Set up multiple animations on a single slide
- Select a shape and use the "with previous" and "after previous" options to control when each animation starts.
- Select a shape and set it to "fly in" at different speeds and from different directions.
- Change the order of the animations