Guide entry section:
Guide Entry Text:
We are getting very close. You've created an animated video clip - now we just need to convert it to an animated GIF.
Previously we compared animated GIFs to flipbooks, where each image only shows for a fraction of a second. By starting with a video clip, we're essentially working backwards. We're cutting up film into individual flipbook images.
The Problem:
A few seconds of video footage can quickly become dozens of individual images that can increase file size quickly. If you don't manage them, your animated GIF will be too large to use online because it will take too long to load.
Managing File Size
For animated GIFs to work on a web page or email newsletter, they need have a small file size, hopefully under 250kbs. Thankfully, there are multiple ways to manage the file size of your animated GIF and understanding those options will help you find the right size for your clip.
- Image Dimensions - This issue is the same as a single digital photograph. The bigger the image in terms of dimensions, the bigger the file size. This is often measured in pixels. A photo that 1200 X 800 has a much larger file size than a photo that is 600 X 400 because it has a lot more pixels. The same is true with animated GIFs. You can decrease the file size by resizing the images in the GIF to be smaller.
- Duration - It's simple. The longer your animated GIF is, the more images it will require. For this reason, most animated GIFs are under 30 seconds in duration.
- Color - In a digital image, color increases file size. Animated GIFs can use up to 256 colors. The more colors that are included, the bigger the file size. To reduce file size, reduce the number of colors in the images. You can also consider using black-and-white or grayscale color schemes. This can have a significant impact on file size.
- Video Source - When exporting a video clip as we did in the last section, you'll see options for the quality of the exported video file. These options can be used to reduce file size. For example, you can export the video at a lower quality setting, which reduces file size. You may also be able to reduce the dimensions of the video to be smaller.
- Frame Rate - Again, think about the flipbook analogy. With an actual flipbook, it may be possible to count how many images flip-by in one second. Maybe 5? 10? This is the frame rate - how many images display in a second. As you can imagine, the higher the frame rate, the bigger the file size. Normal video is often 30 frames per second. With simple animated GIFs like the Venn Diagram, you can go as low as 5 or 10 frames per second. This can significantly reduce file size.
Every Tool is Different
There are dozens of tools that will convert a video clip into an animated GIF and each one has its own set of features and capabilities. Often what differentiates the tools is the operating system on which they were designed to work. I provide multiple options below, but I encourage you to experiment.
Creating Animated GIFs from Video Clips
Camtasia Export to GIF
In the last section, we used Camtasia to create a video by recording a screencast of a PowerPoint animation. This process works on other screencasting tools, but Camtasia takes it a step further. Using the Advanced Export Options, you can create an animated GIF right from Camtasia. The 35 second screencast video below shows you how.
Image:
Guide Entry Text:
Other GIF Creation Options
Below you'll find a number of tools that can be used to convert video clips that are saved on your computer into animated GIFs. I encourage you to experiment. Each app offers its own set of features and limitations.
Best in Class: GIF Brewery ($5US, Mac Only)
GIFBrewery is the best tool I've tested. It provides a great set of features and an "automatic" mode that produces beautiful GIFs at a great file size. I'll talk more about GIF Brewery below.
Free Video-to-GIF Converters (for videos saved on your computer)
- Free Video GIF Converter (PC) Stand-alone app.
- EZGIF (Online - All Platforms) Few limitations, good control options
- ImgFlip (Online - All Platforms) Limited features in free version - "Pro" upgrade available
- Make A GIF (Online - All Platforms) Limited to 10 second duration
- GFYCat (Online - All Platforms) Limited to 15 Second Duration
In most cases, you'll upload the video and make selections about the GIF it will create. As I discussed previously, these selections often focus on color, duration, frame rate, dimensions, etc. To get the GIF right, you'll likely need to experiment using the settings in the converter tool.
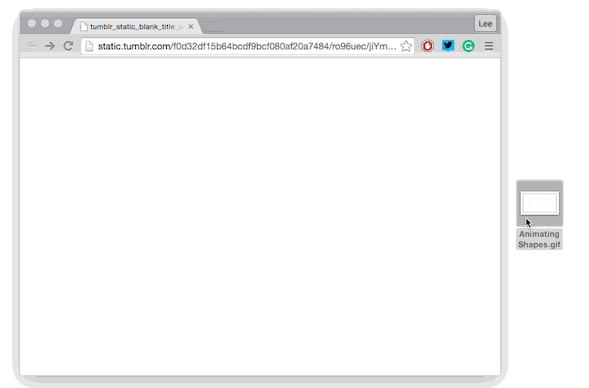
Testing Your GIFs
When you experiment with making new animated GIFs, you'll need an easy way to see how they look. Often, it's not useful to click on the file saved on your computer because the GIF files consist of multiple images. The best way to test a GIF is to drag it directly into your browser. The GIF will play immediately and look just like it will in any other situation. See the simple drag-and-drop example below:
poster image:
Guide Entry Text:
Practice Time
Up to this point, you've created shapes in PowerPoint and animated them. You've also recorded those animations in a screencast and saved the video. Now it's time to convert that video into an animated GIF.
- Open your GIF converter tool
- Use the tool to open the video file you exported
- Change the settings in the GIF converter to try to minimize file size
- Convert the video into a GIF and save it. Notice the file size.
- Drag the new GIF onto a browser window and watch it play. Does it play as expected?
- If possible, change the settings in the converter. Use fewer colors or a smaller frame rate. Save the GIF and watch it.
- Repeat until the GIF works as you'd like.